Scrimba: Snake Game
Published on April 26, 2021
In this article, I document creating my Scrimba Snake Game project taught by Ania Kubow, the style I added, how I addressed the "backing into yourself" issue, and the joystick controller I designed!
Play the Snake Game!
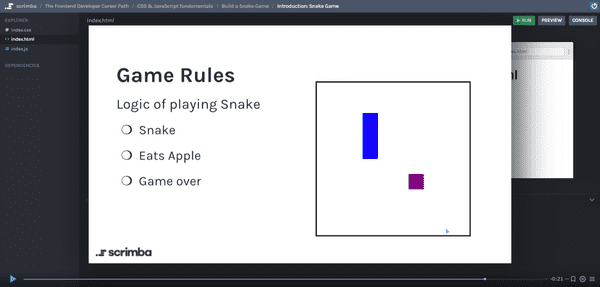
As part of Scrimba's "Frontend Developer Career Path," we are given a snake game project to complete.
We are taught and stepped through coding the game's core mechanics by Scrimba teacher/YouTube celebrity Ania Kubow!
We are encouraged by Scrimba to take "creative liberty" to style it and add features as we see fit.
features that I created
- Added a "High Score"
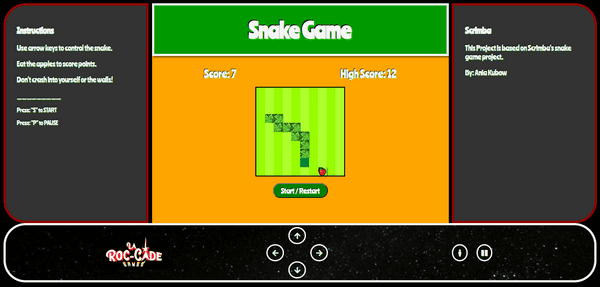
- Styled the game as an arcade cabinet
- Created a joystick controller
In addition to discussing how I coded the program, I also discuss how I set up the environment.
SASS
For this project, I wanted to use SASS. Once again, to set up the environment, I referenced the Brad Traversy course I purchased and completed from Udemy.
Modern HTML & CSS From The Beginning Including Sass
Node Package Manager
To set up the SASS environment in my VS code editor, I'm using node.js.
To check if you have node package manager installed, in the terminal type:
npm --versionIf node package manager is already installed on your computer, after entering the command "npm --version," your computer will display your current version of npm in the terminal.
Create a package .json file
in the terminal type:
npm initor to skip the default of having to enter answers to prompted questions in the terminal type:
npm init -yYou will now have a newly created package.json file.
Next in the terminal type:
npm install node-sassYou will now see a node_modules folder. Now, node-sass will be listed under "dependencies" in your package.json file.
Create a node package manager script
To use SASS, you will need to create a node package manager script.
in your package.json file, you will see "sass" listed under "scripts."
Clear out the default text and replace it by typing:
"scripts": {
	"sass:" "node-sass -w scss/ -o dist/css --recursive"
}
What does this script do?
- node-sass (runs node sass)
- -w (this is a "watch" flag that watches the assigned folder)
- scss/ (is the assigned folder that was flagged to watch)
- -o ("output" to a specified folder)
- dist/css (is the specified folder to "output" to)
- --recursive (this is a "--recursive" flag)
Create an SCSS folder
In the same directory as your node_modules folder and package.json file, create two new folders. The first folder to create will be SCSS, and the second folder will be named dist.
Inside your SCSS folder, create a main.scss file. You will be coding in the main.scss file.
Run the node package manager script
in the terminal type:
npm run sassHow the script works
The first time you run the script, a main.css file will automatically be created in the dist folder.
When you code in the main.scss file every time you save your file, the script will run, and your code will be compiled into the main.css file in your dist folder.
Note: do not code directly in the main.css file. Make sure to code in the main.scss file.
What the dist folder used for
When your project is complete, you will be deploying your project from the dist folder. Along with your other files, such as your index.html, the dist folder will contain the "compiled" sass file, main.css.
What is a favicon
What is a favicon? Wikipedia explains, "A favicon, also known as a shortcut icon, website icon, tab icon, URL icon, or bookmark icon, is a file containing one or more small icons, associated with a particular website or web page."
For this project, I wanted to add a snake icon to the webpage tab. To accomplish this, I did a Google search for "royalty-free snake icons." I used an icon image from iconarchive.com.
How to Add a Favicon to your Site
To add a favicon to your website, all you need to do is create a link to your icon inside the head of your HTML page.
<head>
    <link rel="icon" type="image/png" href="img/Google-Noto-Emoji-Animals-Nature-22285-snake.ico">
</head>
Here is an informative site, w3.org, that I used to reference:
How to Add a Favicon to your Site
Git
Make sure to create a .gitignore file and add the node_modules to it. I initially did not do this, and the node_modules were included.
Also, since I have not added my user name and user e-mail globally, I am prompted to enter them when I try to push my projects to Github. You can use git config --list to view your config setting.
git config --listGame board
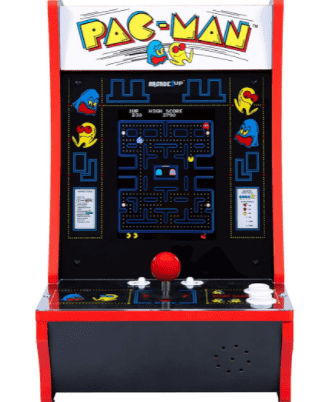
I am loosely modeling this game board in the style of an arcade cabinet.
All rights reserved by Bandai Namco Entertainment
A marquee-style display will hold the game's title. I will be placing the marquee directly above the game board.
An arcade bezel is on the left and the right side of the game board.
Finally, I will create a joystick-style controller. I will be displaying the controller directly beneath the game board.
Taking some creative liberty, I decided to extend the bezel to be the length of the game board and marquee combined. I then reduced the size of the marquee to accommodate the left and the right side bezel.
With this layout, I will have more room to display the game instructions on the left side of the bezel and more room to display information on the right side of the bezel.
JavaScript
Make sure that you connect your JavaScript file in your index.html. As I am accustomed to coding on Codepen and Scrimba, I often forget to add it manually.
<script src="main.js"></script>Coding the game
I followed along with the tutorial to create the core game mechanics. My code is available to view on Github.
For this article, I believe it would be more beneficial to document the original code that I created and added to the tutorial project.
Handling the backing into yourself issue
The snake game ends if you collided with a wall or yourself. However, this logic creates an unintended issue.
If your snake's direction moves to the right and you change the direction to the left, you collide with yourself.
Similarly, if your snake's direction moves up and you change the direction to down, you collide with yourself.
This unintended issue occurs when you change directions in a manner that backs into yourself, respectively.
How I handled the backing into yourself issue
I created a variable called currentDirection.
The core mechanics of the game utilizes a direction variable.
If the snake is moving to the right, the direction variable is set to 1. If the snake is moving to the left, the direction variable is set to -1. If the snake is moving up, the direction variable is set to -gameGridWidth. If the snake is down, the direction variable is set to +gameGridWidth.
Since the snake moves to the right at the start of the game, I set the default value of currentDirection to 1 (right).
Now that we know what the currentDirection of the snake is, we only allow the snake to move in a new direction that is not the direct opposite.
This code states that if the snake's direction is not moving to the right, you can change the snake's direction to move to the left, thus preventing it from backing into itself.
    if(currentDirection !== 1) {
        direction = -1;
        currentDirection = direction;
        joystickLeft.style.backgroundColor = "greenyellow";
        gameSquares[currentSnake[0]].classList.add("snake-direction-left");
      }
However, I must state that I now noticed a new unintended consequence to this logic.
When the snake speed increments by eating apples, the player is forced to touch the arrow keys faster to prevent the snake from a collision.
I then noticed that even with the new code, the snake can still back into itself! Then I realized why.
Within each interval of the snake's movements, it is possible to enter more than one direction to the snake before you see it move.
So if the snake is moving to the right and you quickly press up and then press left within the time of the current interval, the snake backs into itself.
The collision occurs because the player first changes the direction to move up and then changes the direction to move to the left before the snake actually moves.
Since the currentDirection variable is set to 1 (right) and the first assignment of the variable direction was set to -gameGridWidth (up), the snake backs into itself because the variable direction is no longer the opposite of the currentDirection variable.
I believe the solution to this new issue is to write code that only allows one direction assignment per interval.
Styling the snake
I first made the snake green by setting the background color. Then, I added a snake pattern image from Pixabay.
I adjusted the snake pattern image by using a filter, and I added a box-shadow.
.snake {
  background-color: green;
  background-image: url("https://cdn.pixabay.com/photo/2020/01/26/20/17/pattern-4795776_960_720.jpg");
  filter: hue-rotate(750deg);
  box-shadow: 0px 1px 1px rgba(0,0,0,.5);
}
To make the snake's head stand out, I removed the background image and made the head of the snake green by changing the background color.
I needed to add the !important property to prevent unintended changes to the snake's head.
.snake-head {
  background-color: green !important;
  background-image: none;
}
To make the snake look like it's changing directions, I rotated the background image accordingly.
.snake-direction-up {
  transform: rotate(-90deg)
}
.snake-direction-down {
  transform: rotate(-90deg)
}
.snake-direction-left {
  transform: rotate(0deg)
}
.snake-direction-right {
  transform: rotate(0deg)
}
Styling the game board
Background
Since I am using SASS for this project, I took advantage of creating colors with variables and using the darken() function.
$color: greenyellow;
$dark: darken($color,10%);
I first applied the light green color to the game grid.
.square {
   height: 20px;
   width: 20px;
   background-color: $color;
  }
I then used nth-child(odd) to darken the color of every odd square on the game grid.
.square:nth-child(odd){
  background-color: $dark;
}
Apple
For the apple, I used an emoji. I added a drop shadow to it, and I used a "CSS ::after Selector" to place the apple on the game board.
.apple {
   filter: drop-shadow(2px 2px 2px rgba(0,0,0,.5));
}
.apple::after {
  content: "🍎";
}
Creating the game controller
I was excited about creating an arcade-style game controller for the game.
My main goal is to create an arcade-style cabinet that I can reuse for future games that I make.
Game controls
- Directional arrows
- Start button
- Pause button
Directional arrows
To create the directional arrows, I used arrow icons from Font Awsome.
If you do not have a Font Awesome account, you can use the following code in the head section of your HTML document to access and use the fonts:
<link rel="stylesheet" href="https://use.fontawesome.com/releases/v5.12.1/css/all.css" crossorigin="anonymous">"It's an older code, but it checks out."
All rights reserved by Disney and Lucasfilm.
To place and align the arrows, I used HTML div tags and CSS Grid.
I kept the design and color simple, so it would not draw too much attention away from the game.
    #joystick-up,
    #joystick-down,
    #joystick-left,
    #joystick-right {
      border: 3px solid whitesmoke;
      padding: 5px 10px;
      border-radius: 100%;
      font-size: 1rem;
    }
I created the start and pause buttons in a similar manner.
How the buttons work
I utilized the control function that we created in JavaScript as part of the snake game project.
When the user controls the snake by using the keyboard arrows, I wrote code to change the background color of the corresponding arrow keys that are pressed.
joystickRight.style.backgroundColor = "greenyellow";In a similar manner, I also wrote code for the start and pause buttons.
The pause button
While coding and testing the game, I printed out the variables I created to the console log and the JavaScript Popupalert to see what was going on.
I then thought, "why not use the JavaScript Popup alert to pause the game intentionally?"
So, I devised the pause button by printing out code to the JavaScript Popup alert to view my coding mistakes!
All rights reserved by Robert Ross.
Creating touch control buttons
When I showed the game to my child on my computer, she instinctively "touched" the buttons with her finger to control the snake.
I explained that the snake is controlled using the arrow keys and that the arrows only light up to indicate which arrow was pressed.
So then I thought, "well, why not make the arrows touch-controlled?"
I then wrote event listeners for all of the buttons on the game controller that I created.
I then had another thought, "I wonder if this controller will now work on my iPhone?" And you know what? It did!
Now I had the idea to create all of my future games to work both on computers and phones!
Finally, I created a media query to reconfigure the game to be properly displayed on cell phones. I removed the left and right bezel, and I rearranged the buttons on the game controller.
Advance your career with a 20% discount on Scrimba Pro using this affiliate link!
Become a hireable developer with Scrimba Pro! Discover a world of coding knowledge with full access to all courses, hands-on projects, and a vibrant community. You can read my article to learn more about my exceptional experiences with Scrimba and how it helps many become confident, well-prepared web developers!
Important: This discount is for new accounts only. If a higher discount is currently available, it will be applied automatically.
How to Claim Your Discount:
- Click the link to explore the new Scrimba 2.0.
- Create a new account.
- Upgrade to Pro; the 20% discount will automatically apply.
Disclosure: This article contains affiliate links. I will earn a commission from any purchases made through these links at no extra cost to you. Your support helps me continue creating valuable content. Thank you!
Conclusion
Being stepped through creating just the core mechanics to a game project like Scrimba's Snake Game is an excellent method to teach their students how to program.
With just the core mechanics in place, it leaves the rest of the coding to the students' imaginations.
I imagined an arcade cabinet to play the Snake Game on, and then I created it. Next, I imagine an arcade website called "La Roc-Cade," where I will display all of my future games for everyone to play!
Please share it!


