JavaScriptmas 2023 - Week 3
Published on December 18, 2023
Tis the season! JavaScriptmas is here again! JavaScriptmas is a FREE annual festive coding event hosted by the online coding school Scrimba, consisting of 24 daily coding challenges, prizes, and more!
JavaScriptmas 2023
What is JavaScriptmas?
JavaScriptmas is a FREE annual event comprising 24 coding challenges hosted by the online coding school Scrimba. Most of the coding challenges are JavaScript, but this year, there will be a few CSS challenges, and some using AI tools! 🎄
What level of coder do you need to be to participate?
Even if you are starting to learn JavaScript, you can participate. For hints, you can tap into the community, and of course, you can always use Google to help you get to your solution. There will also be Discord channels for the challenges, as well as for FAQs. You can also check out the topic in Scrimba's forum. 💻
JavaScriptmas prize rules
- Each day, you can complete the challenge by midnight UTC, and share your VALID/working solution on Twitter/X for a chance to win a prize! (You can easily post your submission via the share solution button on your Scrim).
- Take part in Santa's Code Review Workshop by picking a JavaScriptmas entry on X/Twitter, doing a code review, and sharing it as a reply post.
- Attend the JavaScriptmas YouTube Livestream on Dec 24 for a chance to win a Mackbook Air M2
JavaScriptmas prizes
The prizes consist of 24 Annual Scrimba Pro subscriptions worth $200, 5 $100 winners for giving a code review of another participant's entry, and a grand prize winner awarded a Mackbook Air M2 worth $1,100! All winners will be announced during the JavaScriptmas YouTube Livestream event on December 24th. 🎁
JavaScriptmas savings
In addition to prizes, be on the lookout for savings with discount prices on their paid courses! If you're interested in taking a paid course from Scrimba, be sure to use the discount code provided: https://scrimba.com/pricing?coupon=Michael-Larocca-Discount-2023#join. (Valid for an additional 10% off semester and annual plans. Expires on July 31st, 2024) 💸
Note: Prizes are limited to one per person
❄Community highlights❄
In the spirit of the festive holiday season, I enjoy featuring others' works in the community highlights section of my JavaScriptmas articles! I will be searching X/Twitter, LinkedIn, and the Scrimba Discord channel for "outstanding" submissions by fellow participants to feature! 🎉
My solutions
Throughout the JavaScriptmas event, I will participate in all 24 coding challenges and document my detailed solutions! 💻
❄Community highlights❄ ⬇
Oyelola (yourgirlria)
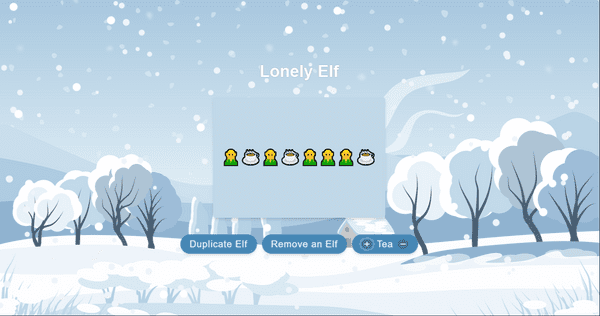
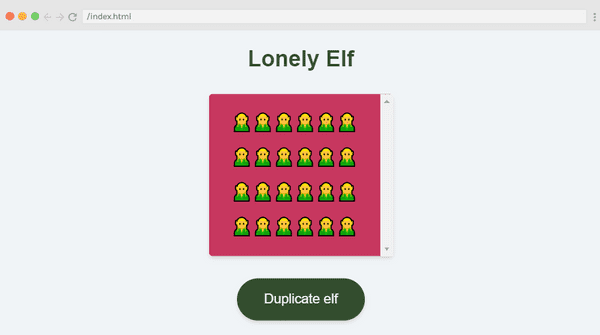
Oyelola not only solved the Lonely Elf challenge but also completed all of the stretch goals! Upon loading the project, you're greeted with a beautiful winter landscape featuring falling snow. Use the "Duplicate Elf" button to add elf friends and the "Remove Elf" button to remove them. However, please don't remove all of the elf friends, as the original elf will become lonely again, and this message will appear: "The Elf is lonely again😔🥺"
If an elf would like a nice hot refreshment to warm up, you can add a cup of tea! When they are finished with their delicious drink, you can remove it.
What a wonderful project! Outstanding work, Oyelola!
Justin (dream_geto)
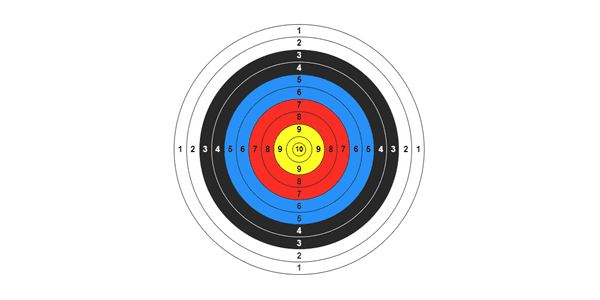
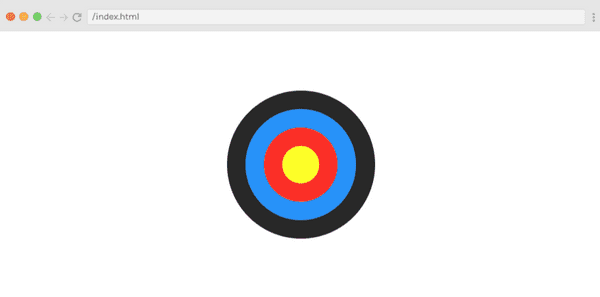
When tackling the "Build an Archery Target" challenge, Justin hit the bullseye! Choosing a more challenging CSS target design, Justin crafted a dartboard complete with multiple scoring numbers for each circular ring!
Upon examining the code to see how Justin achieved this remarkable result, I noticed he successfully utilized CSS calc functions (I struggled with using calc functions and chose a simpler solution 😅).
The final product is a visually stunning representation of a target board, ready for action! Congratulations Justin, you've hit the mark with your coding skills and creativity, truly making your code as impressive as a perfect bullseye!
Govind Kulkarni (Govind02338279 )
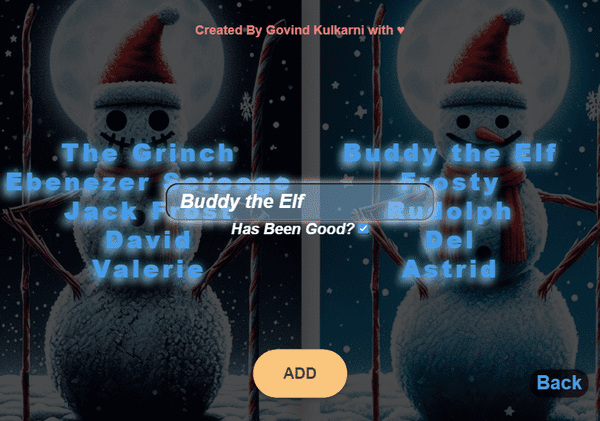
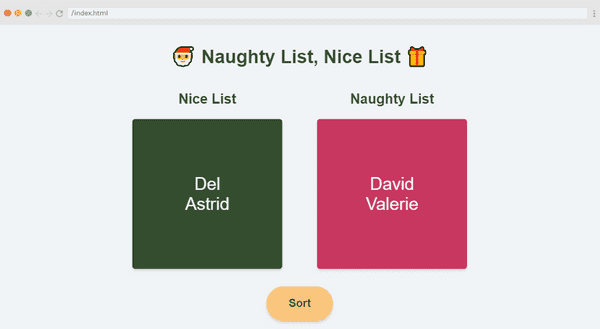
Govind solved the "Naughty List, Nice List" challenge with flair, even accomplishing a stretch goal! In addition to displaying the provided naughty and nice list names, Govind created an impressive animated menu that slides into view when you click on the "Add" button. You can then toggle whether the names you add are for the nice list.
As you add each name, they are properly sorted: the nice names appear on the right side with the cute snowman, while the naughty names are on the left side with the spooky snowman!
I hope I make it onto the nice list! Excellent work, Govind!
My coding solutions ⬇
Day 11: Flag Challenge
Task:
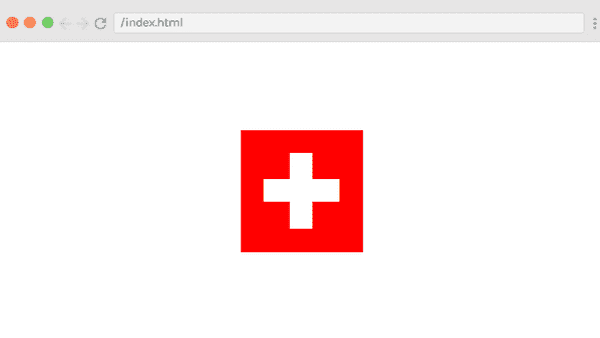
Create the Switzerland flag in CSS.
I created a grid of 25 divs for this challenge on my first attempt. Each div was 25px, and I added red and white color classes accordingly. Then, when I took a closer look at the hint diagram, I realized that each square was not exactly equal. So, even though it looked correct, it wasn't.
I then read the hint: "If the cross is two rectangles sitting one on top of the other, the horizontal rectangle would be 3/16 the height of the flag and 5/8 the width of the flag."
To solve this challenge in accordance with the provided hint, First, in the HTML structure, we create a div to represent the flag and two additional divs within it for the horizontal and vertical parts of the cross.
<!doctype html>
<html>
    <head>
        <title></title>
        <link rel="stylesheet" href="index.css">
    </head>
    <body>
        <div class="flag">
            <div class="cross horizontal"></div>
            <div class="cross vertical"></div>
        </div>
    </body>
</html>
The CSS part is where we style the flag and the cross. We make the flag a 125px by 125px red square. Then, we style the cross to be white and position it relative to the flag. To center the flag in the middle of the page, we use flexbox on the body of the document. This approach allows us to align the flag perfectly in the center, both horizontally and vertically.
The cross consists of two rectangles, one horizontal and one vertical. The horizontal rectangle is approximately 3/16 the height of the flag and about 5/8 the width of the flag. The vertical rectangle follows the same measurements but rotated 90 degrees. The positioning ensures that the cross is centered on the flag. This way, we've created a simple, yet accurate representation of the Switzerland flag.
body {
    margin: 0;
    padding: 0;
    display: flex;
    justify-content: center;
    align-items: center;
    height: 100vh;
}

.flag {
    height: 125px;
    width: 125px;
    background-color: #ff0000;
    position: relative;
}

.cross {
    background-color: #ffffff;
    position: absolute;
}

.cross.horizontal {
    height: 23px;
    width: 78px;
    left: 23px;
    top: 50px;
}

.cross.vertical {
    height: 78px;
    width: 23px;
    left: 50px;
    top: 23px;
}
Day 12: Santa's Gift Sorter
Task:
Help Santa by sorting the gifts array into alphabetical order AND reverse alphabetical order.
Ascending order: ,["bear 🧸", "games console 🎮 ", "guitar 🎸", "jewellery 💍", "kite 🪁", "laptop 💻", "magnet 🧲", "skates ⛸️"]
Descending order: ,["skates ⛸️", "magnet 🧲", "laptop 💻", "kite 🪁", "jewellery 💍", "guitar 🎸", "games console 🎮 ", "bear 🧸"]In this challenge, I had an array of strings, each containing a word and an emoji. My first approach was to simply use the sort() function on the array. However, this didn't provide the correct order because the emojis were interfering with the sort operation.
I then tried sorting by the first character of each string, but this also didn't work because it didn't consider the entire gift name.
Realizing my mistake, I decided to focus on the words only. I split each string into an array of words using the split(' ') function. Then, I compared only the first word of each string to sort the array.
Here's how I sorted the array in ascending and descending order:
const sortedAZ = xmasGifts.sort((a,b)=>{
    const aGift = a.split(' ')[0];
    const bGift = b.split(' ')[0];

    if(aGift < bGift) return -1;
    if(aGift > bGift) return 1;
});

const sortedZA = xmasGifts.sort((a,b)=>{
    const aGift = a.split(' ')[0];
    const bGift = b.split(' ')[0];

    if(aGift < bGift) return 1;
    if(aGift > bGift) return -1;
});
This approach successfully sorted the array based on the words, ignoring the emojis.
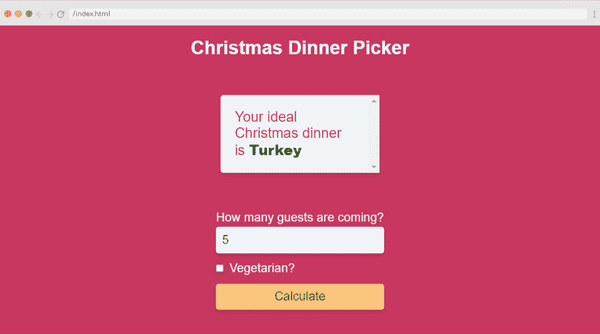
Day 13: Christmas Dinner Picker
Task:
- Write the code to help a user choose the perfect Christmas dinner idea based on the number of people attending.
- Include a checkbox for the user to specify the meal should be vegetarian-friendly.
-
Dinner suggestions (or choose your own!):
Vegetarian: Winter Squash Risotto
4 people or less: Ham
5+ people: Turkey
First, I added the min and max attributes to the number input field in the HTML to ensure the user input was valid. This way, I prevented the users from entering negative values or unrealistically high values for the number of guests ( 12 guests max).
I initially ran into an issue while coding to solve this JavaScript challenge. I was trying to display a message when the number of guests was zero. However, my comparison operation wasn't working as expected. I was comparing the value of guests, which was retrieved from an input field, with 0 using the strict equality operator ===. Little did I realize that the value I was getting from the input field was a string, not a number.
Here's the initial code snippet that was causing me trouble:
if(guests === 0) {
  food.textContent = "Please choose the number of guests.";
}
Thankfully, after some research, I realized my mistake. To correct it, I converted guests to a number using the Number() function before performing the comparison. This change ensured that I was comparing two numbers, which fixed the issue.
Here's the corrected code:
const guests = Number(document.getElementById("num-input").value);
...
if(guests === 0) {
  food.textContent = "Please choose the number of guests.";
}
With that hurdle crossed, I proceeded to code the rest of the function. I used conditional statements to determine the dinner suggestion based on the number of guests and whether they preferred a vegetarian meal. My final code looked like this:
const food = document.getElementById("food");

document.getElementById("btn").addEventListener("click", function() {
    const guests = Number(document.getElementById("num-input").value);
    const isVegetarian = document.getElementById("vegetarian-input").checked;

    if(guests === 0) {
      food.textContent = "Please choose the number of guests.";
    } else if(isVegetarian) {
      food.textContent = "Winter Squash Risotto";
    } else if (!isVegetarian && guests <= 4 ) {
      food.textContent = "Ham";
    } else {
      food.textContent = "Turkey";
    }
});
And there you have it! Through a bit of trial and error, I successfully coded a function to help choose the perfect Christmas dinner based on the number of guests and their preferences.
Day 14: Lonely Elf
Task:
- Write a function to duplicate the elf when the button is clicked.
- Limit the number of elves to 6 per row.
-
Make sure that the elves stay in the elf hangout zone,
no matter how many there are.
- (Stretch goal: Limit the elves to 100)
To restrict the number of elves to six per row, I am styling elements with the 'elf' class in my CSS. I set the font size of the text within these elements to 25 pixels with font-size: 25px;. Then, I use flex: 0 0 calc(100% / 6); to determine the size and flexibility of the 'elf' elements within a flex container. By setting flex-grow and flex-shrink to 0, I ensure that these elements neither grow nor shrink beyond their original size. For flex-basis, I use calc(100% / 6), which makes the base size of these elements about 16.67% of the total width of the flex container. This way, I can fit six items in one row if the container's flex-wrap property is set to wrap.
.elf {
    font-size: 25px;
    flex: 0 0 calc(100% / 6)
}
I also added flex-wrap to the elf hangout zone (in addition to the rest of the provided code).
.elf-hangout-zone {
    flex-wrap: wrap;
}
In my JavaScript code, I'm first grabbing the HTML elements with the IDs "elf" and "btn", and storing them in the variables elf and btn. I'm also grabbing the first HTML element with the class "elf-hangout-zone" and storing it in the variable ctn. I then set a counter variable counterElf to 0, which I will use to limit the number of elves that can be created.
Next, I add an event listener to btn that listens for a 'click' event. When btn is clicked, it triggers the duplicateElf function.
Inside the duplicateElf function, I first check if counterElf is less than 100. If it is, I increment counterElf by 1, create a new div element with the class 'elf' and the text content '🧝', and append it to ctn. This way, every time btn is clicked, a new elf is created and added to the elf hangout zone, up to a maximum of 100 elves.
const elf = document.getElementById("elf");
const btn = document.getElementById("btn");
const ctn = document.querySelector(".elf-hangout-zone");
let counterElf = 0;

btn.addEventListener("click", duplicateElf);

function duplicateElf(){
  if(counterElf < 100) {
        counterElf += 1;
        const elfDiv = document.createElement('div');
        elfDiv.className = 'elf';
        elfDiv.textContent = '🧝';
        ctn.appendChild(elfDiv);
  }
}
Day 15: Build an Archery Target
Task:
- Match the example
- Center on the page
I initially attempted to center the nested divs using the CSS calc() function in the beginning stages of the Archery Target challenge. This powerful function allows you to perform calculations right within your CSS, which seemed like the perfect solution. However, I soon encountered an unexpected issue. The center bulls-eye, the innermost div, was rendered minuscule in size, which was not the outcome I was aiming for.
To maintain proportional sizing for each box, I needed to ensure that each ring of the target was appropriately sized in relation to the others. I started with the smallest ring in the middle, the bulls-eye, which I made 50 pixels big. Then, for each ring around the bulls-eye, I added 50 more pixels to its size. So, the ring around the bulls-eye was 100 pixels, the next one was 150 pixels, and so on. This made each ring look just right compared to the others. After doing this, the target looked exactly how I wanted it to.
Now, I utilized flexbox and the position property to get the rings to align perfectly in the center. I assigned a flex display to each ring and used the justify-content and align-items properties with the center value. This ensured that each ring was centered within its parent ring. I set the border radius to 50% to make all of the divs into circles.
Here's a snippet of the CSS code I used:
.ring {
    display: flex;
    justify-content: center;
    align-items: center;
    border-radius: 50%;
    position: relative;
}
The position property set to relative allowed me to position each ring relative to its normal position. Combined with the flexbox properties, this helped center each ring perfectly within the one that enclosed it.
Finally, I applied a similar flexbox layout to the parent container of all the rings to center the entire target on the screen. This ensured that the entire target was centered within the viewport, achieving the desired result.
Here is the complete CSS code:
:root {
    --black: #282828;
    --blue: #2892f9;
    --red: #fb2f27;
    --yellow: #fdfe29;
}

body {
    display: flex;
    justify-content: center;
    align-items: center;
    height: 100vh;
    margin: 0;
    padding: 0;
    box-sizing: border-box;
}

.rings {
    display: flex;
    justify-content: center;
    align-items: center;
    position: relative;
    width: 200px;
    height: 200px;
}

.ring {
    border-radius: 50%;
    display: flex;
    justify-content: center;
    align-items: center;
}

.ring-1 {
    width: 200px;
    height: 200px;
    background-color: var(--black);
    position: absolute;
}

.ring-2 {
    width: 150px;
    height: 150px;
    background-color: var(--blue);
    position: absolute;
}

.ring-3 {
    width: 100px;
    height: 100px;
    background-color: var(--red);
    position: absolute;
}

.bullseye {
    width: 50px;
    height: 50px;
    background-color: var(--yellow);
    position: absolute;
}
Day 16: Naughty List, Nice List
Task:
- Write the JavaScript to sort the people in sorteesArr into the naughty and nice lists, according to whether they have been good or not. Then display the names in the relevant place in the DOM.
In this challenge, my first step was to use the filter method on the array of children. This allowed me to separate the children into two groups: those who had been good and those who hadn't. However, I quickly realized that I couldn't directly place this filtered list into my HTML. I needed to convert each child into an HTML list item first.
I used the map method to convert each child into an HTML list item. This method allowed me to transform each child in my filtered list into an HTML list item. I was then able to insert these list items into my HTML, creating a visual list of all the children who had been good or bad.
However, I noticed a small issue. There were commas appearing between each of my list items. After a bit of research, I found out that this was because when an array is converted into a string, the default behavior is to separate each item with a comma. To fix this, I used the join method on my array of list items. By using join(''), I was able to remove the commas and create a clean, comma-free list of children.
Finally, I realized there was a "Sort" button! I concluded this challenge by moving my code inside an anonymous function triggered by an onclick event.
const niceList = document.getElementById("nice-list")
const naughtyList = document.getElementById("naughty-list")
const btn = document.getElementById("btn")

const sorteesArr = [
    {
        name: "David",
        hasBeenGood: false
    },
    {
        name: "Del",
        hasBeenGood: true
    },
    {
        name: "Valerie",
        hasBeenGood: false
    },
    {
        name: "Astrid",
        hasBeenGood: true
    }
]

btn.addEventListener("click", ()=>{
    const niceChild = sorteesArr.filter(child => {
        return child.hasBeenGood === true;
    }).map(child =>{
        return `<li>${child.name}</li>`
    }).join('');

    const naughtyChild = sorteesArr.filter(child => {
        return child.hasBeenGood === false;
    }).map(child => {
        return `<li>${child.name}</li>`
    }).join('');

    niceList.innerHTML = niceChild;
    naughtyList.innerHTML = naughtyChild;
});
Day 18: AI alt text generator
Task:
- Use AI to generate alt text for the image provided by generateImage().
- Pass the alt text to renderImage() as a parameter.
{generated_text: "a woman in a star wars costume hugging a chew chew chew chew chew chew chew chew chew chew"}(Note: I accidentally skipped Challenge 17 World Carousel! I will cover it in the next article. 📝)
Like my Christmas Card AI challenge, I also opted to create a Star Wars card!
The prompt I provided retrieved this image and alt text: "Create a festive image that captures the spirit of the Star Wars universe's "Life Day". The scene should be set on the lush, forested home planet of Chewbacca, Kashyyyk. Specifically, it should depict Chewbacca and his family, including his wife Malla, his son Lumpy, and his father Itchy, celebrating Life Day together. They should be on a balcony of their towering treehouse, as seen in the Star Wars Christmas Special and the movie Revenge of the Sith. The family should be joyously engaged in typical holiday activities, such as exchanging gifts or sharing a meal. The background should feature the dense, towering Wroshyr trees of Kashyyyk, bathed in the warm, golden light of sunset. To add a festive touch, the treehouse and surrounding trees could be decorated with glowing lanterns or strands of lights. The card should embody the warmth, joy, and hope that characterizes both the holiday season and the spirit of Star Wars' "Life Day".
As soon as the program starts, the provided HuggingFace inference gets a reference to the dialog modal. When the modal is shown, it waits for the user to submit a description for the image they want to generate. Once they submit their description, the prevent default prevents form submission behavior, extracts the user's input, closes the modal, and starts the image generation process.
To generate an image, I use the HuggingFace API and pass in the user's description as input. I use the 'stabilityai/stable-diffusion-2' model which is trained to generate images from text. The API returns an image which I convert to a URL format that can be used in an HTML image tag.
But I don't just display the image right away. To solve this challenge, I want the image to have an alt text, which is a brief description of the image. So, I generated this alt text using the HuggingFace API again, but this time I used a different model: 'Salesforce/blip-image-captioning-base'. This model is trained to generate a text description of an image. I pass in the generated image to the API and it returns the alt text.
Finally, I display the image. The provided code clears the image container to ensure it's empty. Then, it creates a new image tag, sets its source to the image URL, and sets its alt attribute to the generated alt text. It then appends this image tag to the image container, and that's it! The image is displayed on the screen with a proper alt text.
/** HuggingFace setup **/
import { HfInference } from '@huggingface/inference'
const hf = new HfInference(process.env.HUGGINGFACE_TOKEN)
import { blobToBase64 } from '/utils'

const dialogModal = document.getElementById('dialog-modal')
dialogModal.show()

document.addEventListener('submit', function(e) {
    e.preventDefault()
    const imageDescription = document.getElementById('user-input').value
    dialogModal.close()
    generateImage(imageDescription)
})

async function generateImage(imageToGenerate) {
    /** HuggingFace **/
    const response = await hf.textToImage({
        inputs: imageToGenerate,
        model: "stabilityai/stable-diffusion-2",
    })
    const imageUrl = await blobToBase64(response)
    generateAltText(imageUrl)
}

async function generateAltText(imageUrl) {
    const altText = await hf.imageToText({
        data: await (await fetch(imageUrl)).blob(),
        model: "Salesforce/blip-image-captioning-base",
    });

    renderImage(imageUrl, altText);
}

function renderImage(imageUrl, altText) {
    console.log(altText)
    const imageContainer = document.getElementById('image-container')
    imageContainer.innerHTML = ''
    const image = document.createElement('img')
    image.src = imageUrl
    image.alt = altText
    imageContainer.appendChild(image)
}
If you would like to learn more about my journey with Scrimba and how learning with them may help you, you can read my article: How Scrimba is helping me and many others to become confident, well-prepared web developers
Scrimba has once again impressed and inspired me! You can read my full Scrimba review on my 12/13/2020 post.
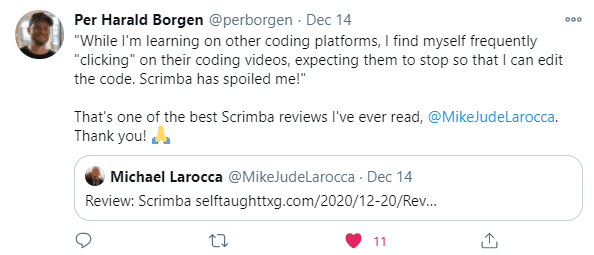
"That's one of the best Scrimba reviews I've ever read, @MikeJudeLarocca. Thank you! 🙏 "
— Per Harald Borgen, CEO of Scrimba December 14, 2020
Advance your career with a 20% discount on Scrimba Pro using this affiliate link!
Become a hireable developer with Scrimba Pro! Discover a world of coding knowledge with full access to all courses, hands-on projects, and a vibrant community. You can read my article to learn more about my exceptional experiences with Scrimba and how it helps many become confident, well-prepared web developers!
Important: This discount is for new accounts only. If a higher discount is currently available, it will be applied automatically.
How to Claim Your Discount:
- Click the link to explore the new Scrimba 2.0.
- Create a new account.
- Upgrade to Pro; the 20% discount will automatically apply.
Disclosure: This article contains affiliate links. I will earn a commission from any purchases made through these links at no extra cost to you. Your support helps me continue creating valuable content. Thank you!
Conclusion
Scrimba's annual JavaScriptmas event is a fun, festive way to commit to coding daily. Whether you are a new coder or a seasoned one, you have an opportunity to share your work with the community, make new friends, and even get a chance to win prizes!
If you're interested in continuing learning with Scrimba after the FREE event, be sure to check out their many FREE courses! If you are ready to commit to becoming a hireable front-end web developer, be on the lookout for discounted course rates!
Don't miss out on this exciting coding event! Participate in Scrimba's JavaScriptmas today, share your solutions, connect with fellow developers, and improve your skills while having fun! Merry JavaScriptmas! 🎄
Let's connect! I'm active on LinkedIn and Twitter.
Are you now interested in participating in this year's Scrimba's JavaScriptmas? Have you already participated in last year's Scrimba's JavaScriptmas? Please share the article and comment!
Please share it!


